Even the best TVs can act up, turning a relaxing movie night into a frustrating tech puzzle. From a sudden black screen to colors that just don't pop, home TV glitches are an annoying but often solvable reality. This guide on TV Maintenance & Troubleshooting isn't just a list of fixes; it's your go-to playbook for confidently tackling common TV problems, ensuring you spend less time scratching your head and more time enjoying your favorite shows.
At a Glance: Quick Fixes for Common TV Headaches
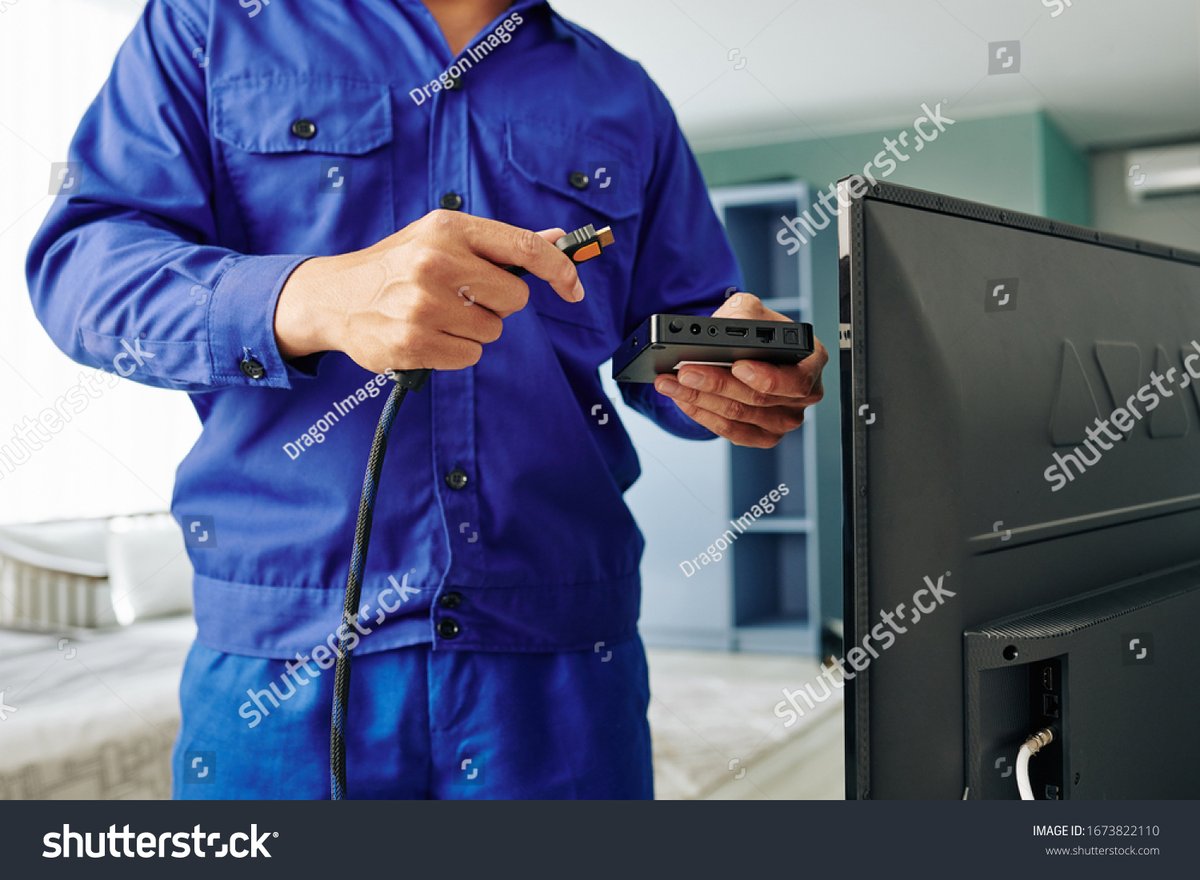
- Always Start with a Reboot: Unplugging your TV and any connected devices from the wall for 60 seconds, then plugging them back in, resolves a surprising number of issues.
- Check Your Cables: Loose HDMI, power, or audio cables are frequent culprits. Reseat them firmly.
- Match Your Inputs: Ensure your TV's input setting (e.g., HDMI 1, AV) matches the device you're trying to watch.
- Factory Reset is Your Friend: For persistent software-related problems, a factory reset can often clear the slate, but be prepared to reconfigure settings.
- Understand Your TV's Limits: Not all TVs support every cutting-edge feature (like advanced HDR or VRR), and some visual quirks (like "blooming" on certain LED TVs) are inherent to the technology.
The Universal First Step: When in Doubt, Reboot and Recheck
Before diving into complex settings, let's start with the most basic, yet often effective, troubleshooting steps. Think of this as the "Ctrl+Alt+Del" for your home entertainment system.
1. The Power Cycle Reset:
This is your first line of defense. Unplug your TV from the wall socket. While it's unplugged, press and hold the power button on the TV itself (not the remote) for about 15-30 seconds to discharge any residual power. Wait a full minute, then plug it back in. Do the same for any connected devices like soundbars, streaming boxes, or game consoles.
2. Inspect All Connections:
Wiggle everything. Seriously. Ensure every cable—HDMI, power, audio, antenna, Ethernet—is securely plugged into both your TV and its corresponding device. A loose HDMI cable, for instance, can cause anything from a flickering picture to a complete loss of signal. This simple step can often fix a "no picture" scenario or sound issues.
3. Confirm Your Input Source:
Sounds obvious, but it’s a common oversight. If you're trying to watch your Blu-ray player, make sure your TV is set to the correct HDMI input (e.g., HDMI 1, HDMI 2) that the player is connected to. Your TV remote usually has an "Input" or "Source" button to cycle through options.
Display & Screen Sorrows: When Your Picture Fails You
These are the most jarring problems – when your TV's primary function, displaying an image, goes awry.
No Picture, But Sound
Your TV is talking to you, but showing you nothing.
- Check the Source: Is the device connected to the TV (cable box, streaming stick, game console) actually powered on and sending a signal? Try connecting a different source device to the same HDMI port to isolate the problem.
- Cycle Inputs: Even if you think you're on the right input, sometimes cycling through all of them can reset the signal.
- Try a Different HDMI Cable: HDMI cables can go bad. If you have a spare, swap it out.
- Update TV Firmware: Sometimes software glitches can cause this. Check your TV's settings for system updates.
Black Screen / Not Responding
The TV won't turn on, might show a blinking light, or no light at all.
- Power Check: Confirm the TV is plugged into a working outlet. Test the outlet with another device.
- Remote vs. TV Button: Try turning the TV on using the physical power button on the TV itself. If it works, your remote might be the issue (see "Remote Doesn't Work Properly" section).
- Power Cycle (Again): A full power cycle (unplugging for a minute) is especially crucial here.
- Look for Status Lights: A red or colored blinking light often indicates a specific error code. Consult your TV's manual for what it means.
Vertical or Horizontal Lines
These can range from faint distortions to prominent, colored stripes.
- Input Check: Lines originating from a specific input source (e.g., only when playing Xbox) suggest the problem lies with that device or its cable. Try a different cable or source.
- Power Cycle: A soft reset can sometimes clear temporary display glitches.
- Factory Reset: If the lines appear on all inputs and even on the TV's menu, it could be a firmware issue. A factory reset might help, but be aware you'll lose all settings.
- Hardware Failure: Unfortunately, persistent lines across all sources and menus often indicate a panel or internal hardware failure, which usually requires professional repair or replacement.
A Critical Safety Warning for Older TVs (CRTs): If you're troubleshooting a very old, bulky Cathode Ray Tube (CRT) television, please exercise extreme caution. CRTs contain high-voltage capacitors that can deliver lethal shocks even when unplugged. Do not attempt internal repairs on these devices. For safe disposal, consult local electronics recycling programs.
Input & Picture Predicaments: Getting the Perfect View
Many modern TV problems revolve around getting external devices to display correctly or optimizing the picture quality.
TV Not Displaying Image from Input
You've connected your device, but the TV just won't show it.
- Input Matching: Double-check that your TV's input source matches the port where your device is plugged in (e.g., if plugged into HDMI 3, select HDMI 3 on the TV).
- Cable Connection: Ensure the HDMI or other input cables are fully seated at both ends. Try a different HDMI cable if available.
- Highest Bandwidth Setting: Modern devices often need higher bandwidth HDMI settings. In your TV's picture or general settings menu, look for options like 'HDMI Mode,' 'HDMI Ultra Deep Color' (LG), 'Full Color' (Vizio), or similar. Set it to 'Enhanced,' 'Standard 2.0,' '2.1,' or whatever the highest available option is. Be cautious: setting it too high for an older cable or device can cause compatibility issues. If problems arise, try a lower setting.
HDR Not Displaying Properly
You expect vibrant HDR, but the picture looks dull or off.
- Source Verification: First, confirm the content you're playing is actually HDR (Dolby Vision, HDR10, HDR10+). Look for logos on the content itself or in your streaming app's info.
- TV HDR Support: Does your TV support the specific HDR format the content is in? For example, many Samsung TVs don't support Dolby Vision (they'll default to HDR10), and some older LG/Sony models might lack HDR10+ support. Check your TV's specifications.
- Full Bandwidth Again: Ensure the HDMI input connected to your HDR source is set to its highest bandwidth mode (as described above). HDMI 1.4, for instance, won't display HDR.
- Auto-Switching: Most TVs auto-switch to HDR mode. If yours doesn't seem to, check your TV's picture settings for an 'HDR Mode' toggle or similar. If issues persist, contact your TV manufacturer's customer support.
High Input Lag When Gaming
Your controller input feels sluggish, making gaming frustrating.
- Enable Game Mode: The most crucial step. All modern gaming TVs have a 'Game Mode' (sometimes called 'Game picture mode'). This bypasses most image processing, significantly reducing input lag. Find this in your TV's picture settings.
- Restart TV: Sometimes, Game Mode doesn't activate correctly. Toggle it off, restart your TV, then turn it back on.
Auto Low Latency Mode (ALLM) Not Working
ALLM automatically switches your TV to Game Mode when a compatible console (like Xbox Series X) is detected.
- TV ALLM Support: Confirm your TV actually supports ALLM. While many newer TVs do, some brands (like Sony) might lack dedicated ALLM support but achieve similar results with 'Auto Picture Mode' for PS5.
- Console Settings: Ensure ALLM is enabled on your gaming console's settings.
- Manual Switch: If ALLM consistently fails, simply switch to Game Mode manually via your TV's picture settings.
Variable Refresh Rate (VRR) Support Not Working
VRR synchronizes your TV's refresh rate with your console's or PC's frame rate to eliminate screen tearing and stutter.
- Compatibility Check: Both your console/PC and your TV must support the same VRR format. For instance, Xbox Series X supports FreeSync and HDMI Forum VRR, but not NVIDIA's G-SYNC directly.
- Enable VRR/Game Mode: VRR usually needs to be enabled in your TV's settings, often found within the Game Mode settings. Ensure it's also enabled on your console or PC.
- Contact Support: If you've confirmed compatibility and enabled all settings, but VRR still isn't working, reach out to your TV manufacturer's customer support.
Chroma 4:4:4 Not Displayed Properly (for PC monitor use)
Crucial for crisp text when using your TV as a PC monitor. Chroma 4:4:4 means full color information for every pixel.
- PC Mode: Some TVs have a dedicated 'PC Mode.' If not, try changing the input label for that HDMI port to 'PC' in your TV's settings. Roku TVs often auto-switch.
- Game Mode: Activating Game Mode can also often enable chroma 4:4:4 alongside low input lag.
- Adjust PC Resolution/Framerate: Chroma 4:4:4 requires more bandwidth. If you're struggling, try lowering your PC's resolution or refresh rate (e.g., from 4K 60Hz to 4K 30Hz or 1080p 60Hz) to see if it enables 4:4:4.
Screen Is Too Dark
Even with bright content, the TV feels dim.
- Increase 'Backlight' (or 'Brightness' on Samsung/Sony): This is the fundamental setting for how brightly your TV's illumination source (LEDs) shines. Max it out to see if it helps.
- Avoid 'Brightness' (or 'Black Level' on some brands): This setting adjusts black levels, not overall screen brightness. Changing it too much can crush shadows or make blacks look gray.
- Know Your TV's Limits: Lower-end TVs simply aren't as bright as premium models and may struggle to overcome ambient light in a well-lit room. Learn more about TV types and their capabilities to understand these differences.
Colors Don't Pop
The picture looks washed out or muted.
- Boost Backlight/Brightness: A brighter picture inherently makes colors seem more vibrant.
- Adjust 'Color Temperature': Switch to a 'Cooler' color temperature setting. This adds a bluish tint, which often makes colors appear more vivid, even if it's less color-accurate.
- Increase 'Color'/'Saturation': Incrementally increase the 'Color' setting. This saturates colors but can lead to an unnatural look if pushed too far.
- 'Dynamic' or 'Vivid' Picture Modes: These modes are designed to maximize perceived vibrancy, often combining stronger colors with cooler color temperatures. They are generally not color-accurate but can be pleasing for casual viewing.
Picture Skips/Jumps, Ball/Puck Disappears, Motion Is Blocky
Common during fast-paced content like sports or action movies.
- Disable Motion Interpolation: This feature (often called 'Motion Smoothing,' 'Trumotion,' 'MotionFlow,' etc.) tries to create extra frames, but it can often cause artifacts, drop frames, make small objects disappear, or give content an unnatural "soap opera effect." Turn it off or set it to its lowest setting.
- Test Different Sources: The issue might be with the source content itself or your streaming service. Try watching the same content on a different app, a Blu-ray, or even another device to see if the problem persists.
White Objects/Clouds Too Yellow or Blue & Colors Look Wrong / Skin Tones Look Wrong
Color inaccuracies can make everything look off.
- Reset White Balance and Color Space: If you or someone else has adjusted these advanced calibration settings, they might be off. Reset them to their default values.
- Adjust Color Tone/Temperature: Experiment with different 'Color Temperature' settings ('Warm,' 'Standard,' 'Cool') to find one that looks most natural to you. 'Warm' is generally closer to cinematic standards, but 'Standard' or 'Cool' might be preferred by some.
- Experiment with Picture Modes: Different picture modes (e.g., 'Cinema,' 'Standard,' 'Vivid') have pre-calibrated color settings. Try cycling through them.
Blacks Look Gray
Instead of deep, inky blacks, you get a muddy gray.
- Reset 'Brightness' (or 'Black Level' on Sony): This setting controls how dark black appears. Reset it to its default or slightly lower it until blacks look deep without losing shadow detail.
- Match Source & TV RGB Settings: Ensure that your source device (console, PC) and TV are both set to the same RGB range (e.g., 'Full' or 'Limited'). A mismatch can cause washed-out blacks.
- Enable Local Dimming: If your LED TV has 'Local Dimming,' enable it and try setting it to 'High.' This feature dims specific zones of the backlight, improving black levels in darker scenes.
- Understand Panel Type: IPS LED TVs inherently show grayer blacks, especially in dark rooms, compared to VA LED TVs or OLEDs. All LED TVs have lighter blacks than older plasma TVs or modern OLEDs.
Brighter Spots in Dark Scenes (Clouding/Backlight Bleed)
You notice uneven backlight patches, especially on dark backgrounds.
- Gentle Pressure: With the TV off, very gently massage the affected area with a soft, lint-free cloth. Be extremely cautious, as TV panels are delicate. This might help with minor pressure-induced clouding.
- Common Issue: This is a relatively common characteristic of LED TVs. Many units will have some degree of clouding or backlight bleed. Return the TV only if it significantly impacts your viewing experience.
Blooming Around Bright Objects in Dark Scenes
A halo of light appears around bright elements against dark backgrounds.
- Adjust Local Dimming: Blooming is often a side effect of local dimming. Try adjusting the 'Local Dimming' setting (e.g., from 'High' to 'Medium' or 'Low') or even disabling it to see if it reduces the effect.
- Inherent to LED: This phenomenon is inherent to LED TVs, particularly those with fewer local dimming zones. OLED TVs, which light each pixel individually, do not experience blooming and have perfect black uniformity.
TV Not Displaying Maximum Resolution
You have a 4K TV, but content looks less sharp than expected.
- Source Resolution: Check the resolution output settings of your source device (e.g., streaming stick, cable box). Many devices have a 'Resolution' or 'Display' setting.
- Content Resolution: Verify that the content itself is available and selected at the maximum resolution (e.g., on YouTube, check the video quality options).
Dark Portions Are Pixelated
Shadows and dark areas look blocky or noisy.
- Enable Noise Removal Settings: Your TV likely has 'Noise Reduction' or 'MPEG Noise Reduction' settings. Enabling these can smooth out gradients but might slightly reduce fine detail.
- Improve Streaming Connection/Source Quality: Pixelation in dark areas is often a sign of low-quality source material or a poor streaming connection. Improve your Wi-Fi or Ethernet connection, or choose a higher quality stream if available.
- Low-Quality Media: Unfortunately, some media, especially older or highly compressed content, simply has pixelated dark areas, and there's no TV setting that can magically fix it.
Grain on the Picture
The image looks rough or speckled.
- Noise Removal (Non-Movie Content): For broadcast TV or general streaming, enable your TV's 'Noise Reduction' settings.
- Improve Connection/Source: Again, a weak signal or poor stream quality can introduce grain.
- Reset Color Settings: Resetting 'Color Space' and 'White Balance' to default can sometimes clear up processing-induced grain.
- Try Different HDMI Cables/Inputs: A faulty cable or TV input can also be a culprit.
- Filmic Grain: Be aware that many movies, especially older ones, are intentionally shot with film grain, which is a natural part of their aesthetic and not a TV error.
Picture Looks Out of Focus
The image seems blurry or lacking sharpness.
- Disable Motion Interpolation: As mentioned, this can sometimes make the picture appear artificially smooth but also slightly blurry or less detailed.
- Increase 'Sharpness': Incrementally increase the 'Sharpness' setting. Be careful not to overdo it, as excessive sharpness can introduce artifacts and make the picture look less natural.
- Adjust Aspect Ratio: If the image is being stretched incorrectly, it can appear fuzzy. Ensure your TV's aspect ratio setting is 'Auto' or '16:9' for widescreen content.
- Low-Quality Media: The most common reason for a fuzzy picture is low-quality source material. The best solution is to watch higher-quality video.
Sparkles/Banding After Calibration
You notice unusual visual artifacts after adjusting picture settings.
- Reset Calibration Settings: If the issue appeared immediately after calibration, reset your 'White Balance' and 'Color Space' adjustments to their default values.
- New HDMI Cable: A marginal HDMI cable can sometimes show its weaknesses with very specific signal types or after certain processing changes. Try a different one.
- Different Picture Mode: Experiment with another picture mode to see if the issue persists across presets.
- Contact Manufacturer: This is a more specific issue that might require advanced troubleshooting with your TV's support team.
Stuck Pixels on Screen
A tiny dot on your screen that's always the same color (red, green, blue, white) regardless of content.
- Gentle Pressure/PC Method: Connect a PC to your TV and display an all-black image. With the TV on, gently apply pressure with a soft cloth to the area around the stuck pixel for a few seconds. Then, turn the TV off and on. This sometimes helps.
- Pixel Refreshers: Some OLED TVs have built-in pixel refresh cycles (usually found in the TV's settings menu). Run this if available.
- Return Policy: If you have many stuck pixels, or if a single one is very distracting, consider returning the TV, especially if it's within the warranty period.
Temporary Image Retention (OLED & LCD)
A ghostly afterimage briefly remains on the screen after a high-contrast element (e.g., a logo).
- Watch Varied Content: This is usually temporary and resolves itself within seconds or minutes by watching regular, varied content.
- Normal Behavior: It's a common characteristic of both OLED and some LCD panels. It's not a defect unless it becomes permanent.
Permanent Burn-in (OLED Specific)
A permanent ghost image (e.g., a channel logo or game HUD) is etched onto the screen.
- No Fix: Unfortunately, permanent burn-in on OLED TVs is irreparable.
- Prevention is Key: It occurs from constant, prolonged exposure to static, high-contrast images (e.g., news tickers, video game HUDs for many hours daily). For users who watch varied content, this is not a common issue. Modern OLEDs have advanced protection features, but prevention remains the best defense.
Audio Anxieties: When Your TV Goes Silent (or Choppy)
Sound is half the experience. Here's how to get it back on track.
No Sound Output
Your TV is showing a picture, but you hear nothing.
- Cable Connections: For external speakers (soundbar, receiver), ensure all HDMI or dedicated audio cables (optical, RCA) are securely connected at both the TV and the audio device.
- TV Audio Output Settings: Dive into your TV's sound settings. Confirm it's set to output audio to the correct source (e.g., 'HDMI ARC,' 'Optical,' 'TV Speakers').
- Source Device Compatibility: Verify your source device (streaming box, game console) is outputting a compatible sound format (PCM, DTS, Dolby Digital are generally safe bets). Your TV might not support all advanced audio formats (e.g., some older TVs don't support DTS passthrough).
- Test Cables/Devices: Try a different audio cable. If you have an AV receiver, test if other devices can play sound through it. This helps isolate whether the problem is with the TV or the external audio system.
Sound Is Delayed (Lip Sync Issues)
The audio doesn't match the picture, creating a distracting echo or lag.
- 'Lip Sync' / 'Audio Delay' Settings: Many TVs and AV receivers have a 'Lip Sync' or 'Audio Delay' adjustment feature in their sound settings. Experiment with these to synchronize the audio.
- PC Mode Input: If connecting a PC, setting the TV's input to 'PC Mode' (as discussed earlier) can sometimes reduce audio processing latency.
- Bluetooth Latency: Be aware that Bluetooth-connected soundbars or headphones inherently have some audio latency, which can lead to minor delays. This is a characteristic of Bluetooth technology and often cannot be fully eliminated.
- Contact Support: If you've tried all adjustments and the delay persists, contact customer support for your TV or audio receiver.
App & Wi-Fi Woes: Smart TV, Smarter Solutions
Smart TVs bring convenience, but network and app issues can quickly derail it.
Can't Stream 4K Video on 4K TV
Your internet is fast, your TV is 4K, but content streams in lower quality.
- Service/Subscription: Does your streaming service and subscription tier actually allow for 4K streaming? (e.g., some Netflix plans are HD only).
- Video Player Resolution: In apps like YouTube, check if there's a specific option within the video player to select 4K resolution.
- Internet Speed: Ensure your wireless network and internet connection meet the bandwidth requirements for 4K streaming (typically 25 Mbps or higher dedicated for that stream). Run a speed test on your TV or a device connected to the same network.
- Contact Support: If all checks out, but 4K still eludes you, contact the streaming service or TV manufacturer for specific troubleshooting.
Video Won't Stream in TV's Browser
You're trying to watch something directly from a website on your TV's built-in browser.
- Browser Limitations: Most TV browsers are quite basic and lack support for older web technologies (like Flash video) or advanced codecs. There's usually no direct fix for this limitation.
- Workaround: Connect a PC: The most reliable solution is to connect a laptop or desktop PC to your TV via an HDMI cable and use its browser for playback.
Can’t Connect TV to Wi-Fi
Your smart TV is suddenly disconnected from the internet.
- Restart Everything: Power cycle your TV and your internet router/modem. Unplug them for 60 seconds, then plug them back in, starting with the modem, then router, then TV.
- Ethernet Connection for Updates: If possible, temporarily connect your TV to your router via an Ethernet cable. This often allows the TV to download any pending system updates, which might include Wi-Fi driver fixes. After updating, try reconnecting to Wi-Fi.
- Factory Reset: As a last resort for network issues, a factory reset of the TV can sometimes resolve persistent connectivity problems.
- Contact Support: If all else fails, your TV's Wi-Fi module might be faulty, requiring manufacturer support.
Can’t Find/Download an App
The app you want isn't in your TV's app store.
- App Store Limitations: You can only download apps that are available on your TV's specific operating system app store (e.g., Roku Channel Store, LG Content Store, Google Play Store for Android TVs). Not every app is made for every TV platform.
- External Streaming Device: If an app isn't available, your best bet is to get an external streaming stick or box (Roku, Fire TV, Apple TV, Chromecast) which often have broader app support.
Cable, Satellite, & Over-The-Air (OTA) Headaches: Tuning Into Trouble
Issues with traditional broadcast or subscription TV.
Can't Find/Change Channels
You're stuck on one channel or can't access any.
- Run Channel Scan/Programming: You'll need to run the TV's automatic channel programming or scan feature. This is usually found in the TV's settings under 'Channels' or 'Broadcasting.'
- Antenna Reposition (for OTA): For over-the-air channels, try repositioning your antenna for better reception. A small move can make a big difference.
- Cable/Satellite Box Check: If using a cable or satellite box, ensure it's powered on and receiving a signal. You might need to troubleshoot that box separately.
- Contact Manufacturer Support: If the TV isn't detecting channels despite a good source, it might have an internal tuner issue.
TV Channels Look Fuzzy
Your broadcast channels look blurry, pixelated, or low quality.
- Source Output Resolution: Ensure your cable/satellite box is set to output at least 720p or 1080i/p. Lower resolutions will look poor on a modern TV.
- Enable Noise Removal: Your TV's 'Noise Reduction' features can sometimes help clean up fuzzy broadcast signals, though they might soften fine details.
- Slightly Increase Sharpness: A very minor increase in the 'Sharpness' setting might make fuzzy channels appear a bit crisper, but avoid overdoing it.
- Inherent Quality: It's important to note that many broadcast TV channels, especially standard definition ones, are inherently lower quality than streaming or Blu-ray content. They often look somewhat fuzzy or blurry when stretched across a large, high-resolution screen.
Remote & Power Puzzles: Taking Back Control
When your main interface with the TV becomes unresponsive.
TV Turns Off Randomly
Your TV decides to quit on its own.
- Disable CEC (Consumer Electronics Control): CEC (also called Anynet+, Bravia Sync, Simplink, etc.) allows connected devices to control each other. Another device (e.g., a streaming box or soundbar) might be erroneously sending a "power off" signal to your TV. Try disabling CEC in your TV's settings or for specific inputs.
- Remote Issues: Is a button on your TV remote (especially the power button) stuck? Remove the batteries from the remote for a while to see if the random shutdowns stop, isolating the issue to the remote.
- Reset/Replace Remote/Device: If a specific remote or device is identified as the culprit, try resetting it or replacing its batteries.
- Factory Reset TV: For persistent, unexplained shutdowns, a factory reset can sometimes clear software bugs.
- Contact Support: If none of these work, it could be an internal power supply issue with the TV, requiring professional repair.
Remote Doesn’t Work Properly
Buttons are unresponsive, or the remote only works sometimes.
- Line of Sight: Ensure nothing is blocking the path between your remote and the TV's IR receiver (often a small sensor underneath the center of the TV). Move soundbars, game consoles, or other objects.
- Optimal Angle: Try pointing the remote at different corners of the TV.
- Interference: Move other electronics (like a cable box) slightly away from the TV, as they can sometimes interfere with the TV's remote receiver.
- Re-pair Remote (if Bluetooth/RF): Many modern smart remotes connect via Bluetooth or RF. Check your TV's settings for an option to re-pair the remote.
- Replace Batteries: The simplest fix, but often overlooked. Old batteries are the most common reason for remote failure.
Voice Control Not Working
Your TV isn't listening to your commands.
- Bluetooth Connection: Voice control often relies on the remote being connected via Bluetooth, not just IR. Ensure your remote is paired correctly (check TV settings).
- Batteries: Voice commands draw more power. Ensure your remote has fresh batteries.
- Distance/Obstacles: Be relatively close to the TV and remote, and ensure no obstructions are blocking the remote's microphone.
- Contact Support: If voice control remains unresponsive, your remote's microphone might be faulty, or there could be a software bug.
Proactive Care: Simple TV Maintenance Tips
A little prevention goes a long way in keeping your TV running smoothly.
- Keep it Clean: Dust is the enemy of electronics. Gently wipe down your screen with a micro-fiber cloth (never use paper towels or harsh chemicals). For stubborn smudges, lightly dampen the cloth with distilled water or a specialized screen cleaner. Dust the vents and back of the TV regularly to prevent overheating.
- Proper Ventilation: Ensure your TV has adequate airflow, especially if it's in an entertainment center. Don't block air vents. Overheating can lead to component failure.
- Software Updates: Regularly check for and install firmware updates. These often include bug fixes, performance improvements, and sometimes new features.
- Surge Protector: Connect your TV and all connected devices to a good quality surge protector. This shields them from power fluctuations and lightning strikes.
- Avoid Extreme Temperatures: Don't expose your TV to direct sunlight or extreme cold.
- Vary Content (OLEDs): If you have an OLED TV, vary the content you watch and avoid leaving static images (like channel logos or game menus) on screen for many hours to prevent the slight risk of burn-in. Most modern OLEDs have built-in pixel refresh features that run automatically, but mindful usage helps.
When It's Time to Call in the Pros (Or Replace): Knowing Your Limits
While many TV problems are DIY-friendly, some require expert intervention or signal it's time for an upgrade.
If you've tried all the relevant troubleshooting steps and your TV still isn't cooperating, consider these points:
- Complex Internal Failures: Problems like a consistently black screen despite power, persistent lines not fixed by resets, or sudden, repeated power-offs often point to internal hardware issues (power supply, main board, panel). These are typically beyond a user's ability to fix safely or cost-effectively.
- Cost of Repair: For older TVs, the cost of professional repair can often approach or exceed the price of a new, entry-level television. Get a repair quote, but weigh it against current TV prices and new features.
- Warranty: If your TV is still under manufacturer warranty, contact their customer support immediately. Attempting DIY internal repairs will almost certainly void your warranty.
- Safety First: Never open your TV's casing unless you are a trained professional. High-voltage components can be dangerous.
Empowering yourself with these troubleshooting techniques means you're rarely truly helpless when your TV misbehaves. With a little patience and methodical investigation, you can restore your entertainment hub to its full glory, turning glitches into mere bumps in the road.